-
1 Opening and closing the panel -
2 Selecting a CSS file -
3 Selecting a selector -
4 The properties panel- Editing a value
- Deleting a property
- Editing as free text
- The green note below a property
- The syntax line at the bottom
- More menu options
-
5 Adding a property- Tree view
- List view and search
-
6 Adding a selector -
7 Viewing discrepancies (Diffs) -
8 Saving- When saving fails
- The red badge
-
9 Settings- Panel transparency
- Remembering panel position
- Save format
- Save address
- Authentication details
-
10 Server-side saving (PHP example)- se5-conf.php — configuration
- se5-save.php — the save endpoint
- Keeping old versions (optional)
User Guide — CSS StylEditor
Opening and closing the panel
Clicking the extension icon in the browser toolbar opens the editing panel on the current page. Clicking the same icon again closes the panel.
Selecting a CSS file
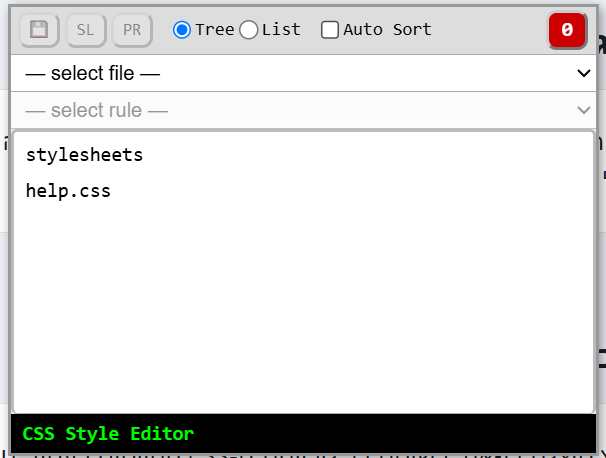
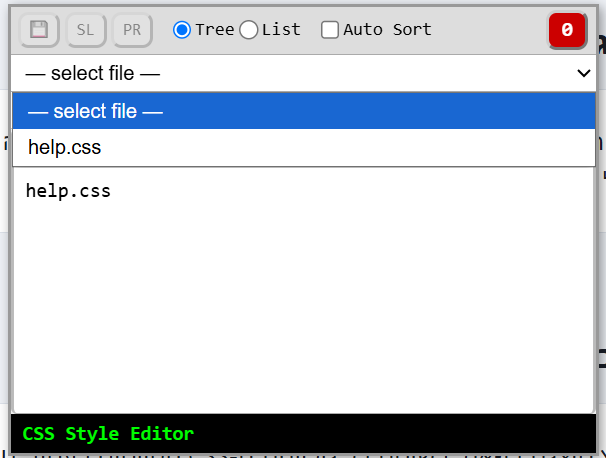
Before selecting a file, the panel shows a list of all the CSS stylesheets present on the page. You can pick a file through a dropdown menu, or by clicking its name directly in the list — both ways are equivalent.
Notice the numeric badge in the top toolbar - it will turn red once there are changes that haven't been saved yet (explained in detail later in this guide, in the Save section).
Selecting a selector
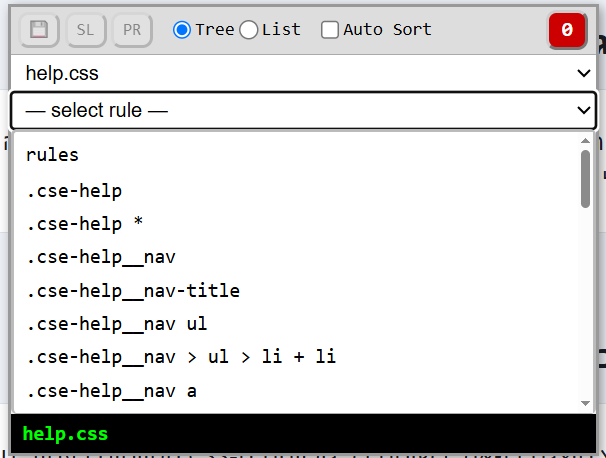
After choosing a file, you can select a selector (a CSS rule) from it through a dedicated dropdown menu, or by clicking its name in the list shown in the panel. Selecting a selector loads all of its defined properties for editing.
The properties panel
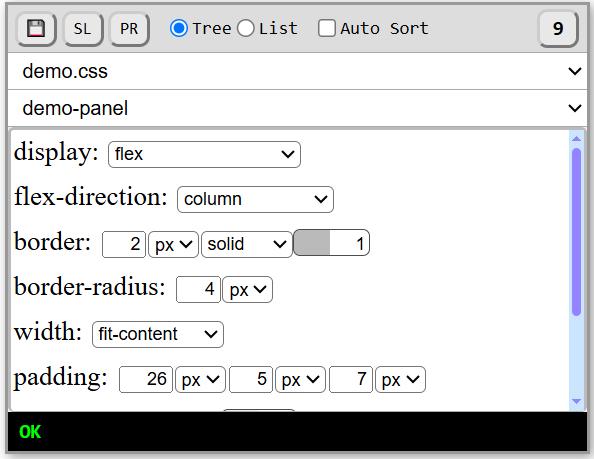
After selecting a selector, the panel shows a list of all its properties. Each property gets an editing row suited to its value type, and every change updates and is shown immediately in its place on the page.
Editing a value
Each property gets a control suited to its value type: a numeric field with a unit picker, a list of values to choose from, a color picker with transparency, building a function value from parameters, or a checkbox to toggle a keyword on/off.
Deleting a property
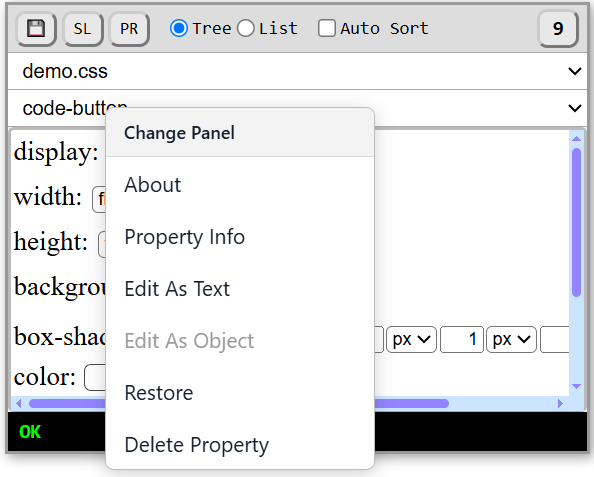
Right-clicking the property name opens a menu with an option to delete the property from the rule. After deletion, the list refreshes.
Editing as free text
From the same right-click menu you can switch from the split editing (by type) to editing the value as free text, and switch back to the split editing from there.
The green note below a property
If the value actually set in the browser differs from the value entered in the control (for example an invalid value the browser rejects, or a color computed differently) - a small green line appears below the property, showing the value that was actually registered in the stylesheet. When there is no difference, this line isn't shown at all.
The syntax line at the bottom
At the bottom of the panel, a line shows the full syntax of the selected rule, updating immediately with every change to the properties - as they were actually registered in the browser's stylesheet.
More menu options
From the right-click menu you can also restore a property to the value it had when the panel was loaded, and open general information pages about the tool and about the selected property.
Adding a property
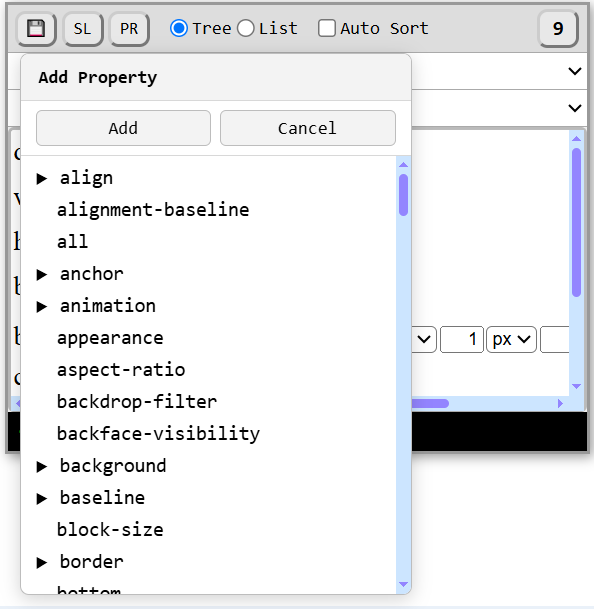
You can add a new property to the current rule through a dedicated button in the top toolbar. The new property is added with a sample initial value, ready for immediate editing. You can pick the property using two display methods — your choice between them is remembered automatically for next time.
Properties that already exist in the same selector won't appear in the list of properties available to add, and neither will properties that aren't supported (not recognized) by the current browser.
Tree view
A tree organized by name prefix (for example, all properties starting with border are grouped together), for browsing the groups step by step.
List view and search
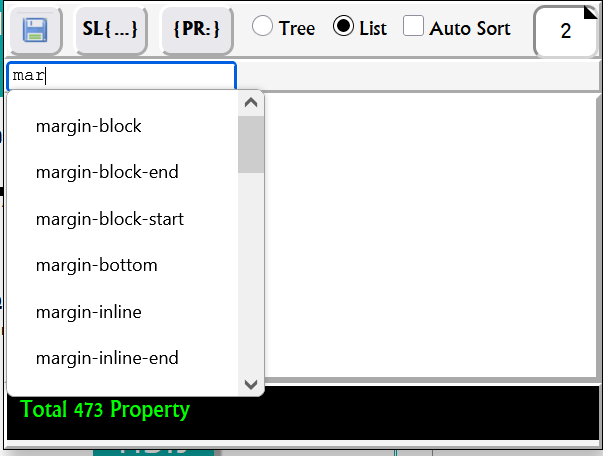
A flat list with a search field and autocomplete by the requested property's name.
Adding a selector
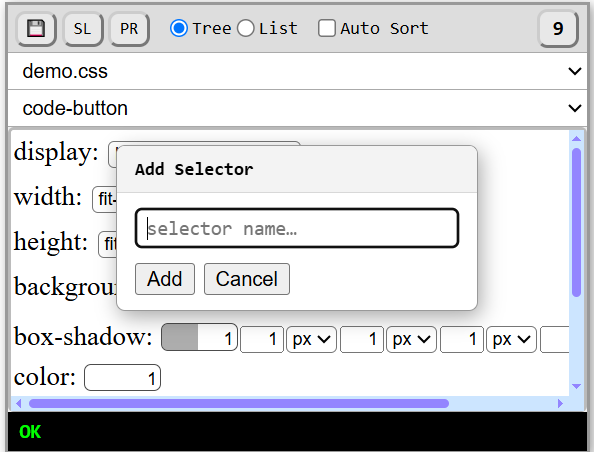
A dedicated toolbar button adds a new selector to the file, right after the currently selected rule. When adding, you need to enter a name; the tool checks that the name is unique, and the new selector is automatically selected for editing.
Viewing discrepancies (Diffs)
Sometimes the CSS loaded into the browser's memory isn't exactly identical to the raw content saved in the file - the browser may normalize certain values (for example colors, units, or shorthand syntax) differently from how they were originally written. This is why the Diffs panel exists - to let you compare the two before saving.
A regular click on the numeric badge in the toolbar opens the Diffs panel. The panel compares the current state in the browser to the content of the file saved on the server, and shows two lists:
- Client — properties that exist in the browser (client-side) and haven't been saved to the file yet.
- Server — properties that exist in the file saved on the server but don't currently exist in the browser.
When such differences exist, the badge itself turns red. Clicking the badge again closes the panel.
Behind the scenes: the comparison is done by fetching the raw content of the files from the server and cross-referencing it against what's loaded in the browser's memory.
Saving
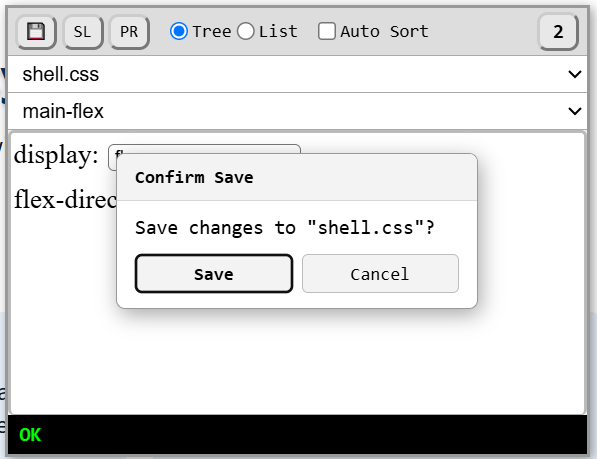
The save button saves the current CSS file to the server, at the address defined in the settings. A confirmation dialog is shown before saving.
Before saving for the first time, it's recommended to first read the Settings section later in this guide — it sets the save address and authentication details, without which saving will not succeed.
When saving fails
If saving actually fails on the server side — for example an authentication problem, an unauthorized path, or a file that doesn't exist — a detailed error message explaining what happened will be shown, not just a generic failure notice.
The red badge
The numeric badge in the toolbar also serves as a visual indicator: when there are differences between the browser and the saved file (as shown in the Diffs panel), the badge turns into a red background with white text — a sign that there are changes not yet saved.
Settings
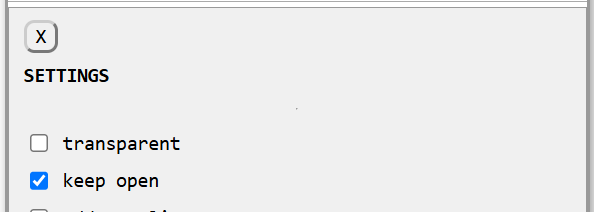
Right-clicking the numeric badge opens the settings panel. If the Diffs panel is open, it closes automatically when settings is opened (and vice versa). The settings in this panel determine how the tool works, and in particular how saving to the server is performed.
Panel transparency
When checked, the panel is shown with partial transparency as long as the mouse isn't over it, and returns to opaque when the mouse is over it.
Remembering panel position
When checked, the panel's position on the screen is saved and reloaded next time. Without it checked, the panel returns to the default position on every load.
Save format
Determines how the CSS is written to the file when saving: multi-line (each property on a separate line) or one continuous line per rule.
Save address
The server address to which the file's content is sent when clicking Save. Without an address defined, saving will not take place and an error message will be shown.

Authentication details
A pair of fields (name and value) sent along with the save request, in case the server requires authentication before accepting an update to the file.

Server-side saving (PHP example)
The two files below are only an example of a server-side script that receives the CSS content sent when clicking "Save" and writes it to the file on disk. You're welcome to change them as needed, or write the exact same logic in any other server-side language (Node.js, Python, etc.) — the extension only needs a URL that accepts the POST request described below.
Download se5-conf.zip — contains both files.
se5-conf.php — configuration
Defines the server-specific settings that se5-save.php reads: a "dry run" mode for testing without actually writing files, a whitelist of allowed path patterns (regex) that may be updated, a pair of authentication key/value — different for requests coming from the server itself versus external requests — and an optional URL prefix to strip when converting a full page address into a relative disk path.
se5-save.php — the save endpoint
This is the file whose URL is entered in the extension's "Save address" setting. It accepts a POST request with a JSON body:
{
  "apiVersion": number,
  "check"?: true,               // ping only, to confirm the endpoint is reachable
  "href": string,                 // full page URL (location.href) the CSS belongs to
  "pageBase"?: string,              // the page's <base> URL, if it has one
  "content": string,                 // full CSS file content to write
  "<authKeyName>": "<authValue>"  // must match SE_AUTH_KEY / SE_AUTH_VAL
}
It converts href into a relative path under the server's document root, checks that the path is a .css file and matches an allowed pattern, and — unless dry-run mode is on — writes content to that file. Both files can be placed anywhere reachable on the server, as long as they sit together in the same folder.
Keeping old versions (optional)
The example script overwrites the file directly and doesn't keep any history. Anyone who wants to can extend it — before writing the new content, copy the file's current content into a separate backup/versions folder, to keep a history of previous saves.